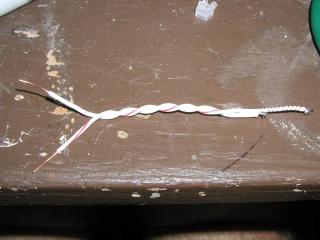
(But first, another warning.....yeah!!!):
Igniters can be unsafe in their own respect. Each have their own danger and caution should be used when handling any igniters. Proper precaution should always be used. In these examples high current voltage will be used. ONLY persons with sufficient electrical know how or experience should attempt the bridge gap igniter.
So for the bridge gap igniter I have my very own electrical warning i will copy from another project:
This project contains HIGH VOLTAGE in the 110-120 volt range of AC power. This project has the tendency to be dangerous if not handled with care, precaution, and experience. Please do not attempt this project without an understading of ac/dc theory and safety around such power. I will not be responsible for any damage, injury or death attempted from undertaking my project as displayed on this page. You accept all responsibility if you choose to copy my idea or any part of it.
Tools and materials:
Bridge Gap Igniter -
1. (8) inches *per* igniter of either twisted pair wire or dual conductor wire.
2. Wire strippers
3. Lamp Cord (or other very thin wire strand, nichrome works great if you can obtain it)
4. Soldering Iron
5. Solder (duh)
6. Power Drill (optional)
7. Vise or something to hold the wire (optional)
-----------------------------------------------------------------------------
Rope Fuse -
1. 50 feet of rope fuse. (I ordered "1/16 Chinese Fuse" from CannonFuse.com)
2. Toothpicks. (one for every two engines you load with rope fuse)
Alright, lets get started on the igniters. The first type of igniter I will be introducing is the
"Bridge Gap Igniter"
:
Step 1:
Cut an 8 inch piece of wire. This can be twisted pair cat 5, or dual conductor wire like im using.
Step 2:
Now, on one of the conductors snip one side 1/2 inch lower than the other and then strip about 1/8 of insulation off the shorter conductor.
Step 3:
On the other conductor snip off 1/8 inch of insulation
Step 4:
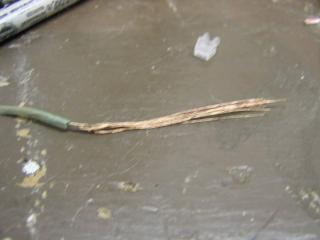
Now take one small strand of lamp wire (or other small diameter strand) and cut it to about 4 1/2 inches.
Step 5:
Take your small strand of wire and solder it on to one of the bare wires.
(insert pic)
Step 6:
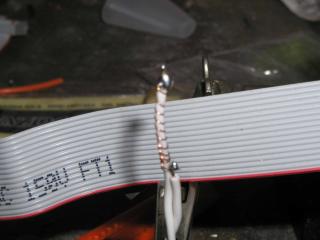
Curl the small strand of wire loops around longer conductor until you reach the other stripped wire and solder it into place.
Step 7:
Strip of about 1/4 inch of insulation on both conductors at the other end of the wire.
(Insert pic)
Step 8:
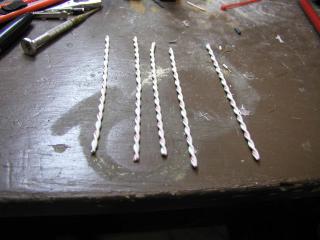
Almost finished...Now twist the wire to make it look nice and neat as well as more bendable for inserting into akward engine arrangements.
Step 9:
Repeat for as many igniters as you desire.
(insert pic)
The upside to using this type of igniter is that you are insured a good light of the core and its relative safeness when it comes to launching, cause its usually very fast to ignite and launch can be stopped, unlike the fuse type ignition, where once its lit, theres no way to stop it safely.
The downside is though, you have to have a source of high current handy for ignition. This can either be a charged car battery or a/c voltage source. Also there is the danger of accidental ignition due to carelessness of the user. This can happen when loading the igniter with a hot line as I will explain in static testing quite extensively.
DO NOT ATTEMPT TO USE ANY OF THESE IGNITERS UNTIL YOU HAVE READ THE "STATIC TESTING" PAGE IN ITS COMPLETENESS!!!
"Rope Fuse"

Theres not really much to using rope fuse for ignition. So since there's no real construction needed to use rope fuse im gonna save the instructions for how to use it for static testing, just like I did the bridge gap ingiters.
The upside to using rope fuse is its fairly simple to use and only requires a mininum of tools and materials to load and operate. The downside is the fact that you have no control of launch once its lit. Another downside is the fact the hot exhaust gases have a nasty habit of spitting out the fuse before the whole fuel core is lit. This causes poor ignition and the engine to sputter wasting fuel mass before the whole fuel grain is lit and aqquiring total impulse.
"Wiring Harness With Clips"
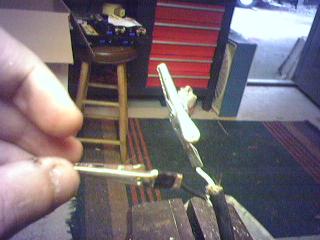
So Bassically all I did was take a replacement lamp or vacum cord, spliced the two wires and crimped on alligator clips to the end. I did this to make ignition safer and quicker. This is not a required step if you plan on just pluggig the stripped ends of the bridge gap into the end socket of the eletrical cord or if you plan on using the rope fuse.
Ah, next section we get to test the motors:
Section 7: Static Testing
