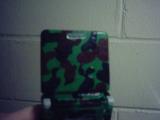
As you can tell by the heading, this page is showing my new and improved GBA SP. The only thing improved about it is the color, but this makes it unique. Here you will read the steps that i took to color my SP.
First, i had to get all those little screws out, this was a major pain since nintendo made their own and put a stupid three groove screw in it. So to take these out i use my glasses repair kit and used the smallest flat head screwdriver and forced it to work. i know this probobly wasn't the best method, but i WANTED it done. So i was able to take it all apart and stored everything away nicely for when it was time to put it all back together. when i took it apart, it came in six different pieces. you may be thinking, six, how? well you have each side of the top and bottom pieces and then the battery cover and then there is curved part at the hendge that comes off. after i got everything seperate, i sanded it down and put a base coat of white on.
next was the fun part of desciding on the color scheme. at first i was just going to use green and black, but as i was bouncing ideas off my friends, Shadow here, came up with the camo idea. so i went out and bought some brown to add to the my collection and was one step closer to my goal.
green was the first color i put on. i put close to two coats on, to where it looked like it was completly covered. next, i gently scored it so the cheap wally world paint would have something to grab onto, but that still didn't work. any ways, after it dried for a day the task of color design patter was at hand. the thought of having to be so precise and exact didn't thrill me, but i was told a better way. use tape. so i covered the whole thing in tape and first drew the shape i wanted then cut it out. now all i had to do was color it. i wasn't precise with that because i didn't have to. after the first color dried, i did light touch ups and let the whole thing dry for a day, i used a fan to help insure that it was really done, and for ventilation pruposes. then, i repeated the process again and put on the final color and let it dry.
finally, after it was all dry, i put on a few light clear coats, in hopes to seal it all in, i guess i didn't do it enough times. once i felt it was finished coloring and drying, i started to put it back together. i had to clean up in a few places where the paint was too thick for the parts to fit together and all, but was able to get it to work. then i put the parts back in and screwed it back together. yeah, i finished it, now came the time to play it. i had to mess with it some because i didn't get the buttons aligned prefectly at first, but now it works just fine.
This project was two weeks in the making. after i finished it, i noticed something really cool. some of the places where i made the colors wrap around the sides actually met other pieces to where it seems like i was trying to have the pieces look as if i did it while it was together. i was sooo excited to finally get it all done, mainly so i could get back to playing it some more. i'm happy with the final product right now, but once i get some more money i'm going to use more profession and perment means of painting it. if you check back around 2005, i might have it redone.
|
[Window width:
*400*
640
800
1024
1200
1600
] [Image size: XS *Small* Medium Large ]
|
e-mail me at: mynintendoaddress@hotmail.com
